
Making the RV Bunk Ladder user friendly!
Our beautiful home has some quirks just like every other house that we have had. Our home is a home on wheels, and is a 37 foot fifth wheel. A bit smaller than we lived in prior, but it does get us where we need to be.
The model is a Keystone Sprinter 32 BH. The BH stands for “Bunk House.” Purchased so our son could have his own room, the bunk house made the most sense at the time. It has 2 beds, and a fold down sofa, for one kid. Pull out the extra bunk (and ditch some weight). Now 1 bunk bed and one sofa. He chose to sleep on the sofa.
Fast forward a few months, and we are now trying to make a better space for him to do his school work while the rest of the house is also working. We need the sofa to be a sofa!
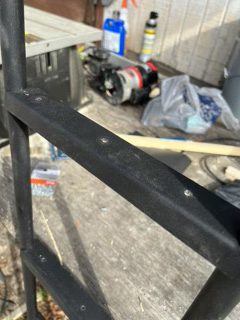
Now comes the hard part. The ladder included in the RV is not user friendly. This metal ladder had rungs that were 1 inch and square with the side rails. This made climbing the ladder by stepping on the corners every time you went up to the bunk very uncomfortable.

Finally one of the adults ask our son “If the ladder didn’t hurt the feet, would you sleep on the top bunk?” To which he answered yes. Now a bright idea had to be created into existence. We decided to add solid large steps to the painful ladder, a modification that would improve the usability.
Easy you say! Making a bunk ladder user friendly should be easy! I thought so, too. The plan was to cut a notch into a few boards and bolt them on. First trip to the big box store, I get screws (1/2″ #8 wood screws) and a 2x4x8. Along with stain that would hopefully match the interior color.
Step 1: Measure the Length of the steps. Cut the board to length, mine were around 10 1/2″ and there are 4 steps. Cut a 5th one for testing and setup. Dry fit them to make sure they fit properly between the verticals of the ladder.
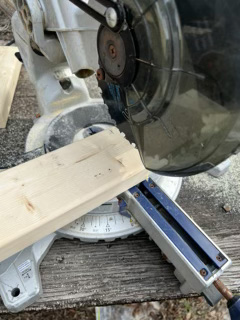

Step 2: Angles and Cuts. Prop the ladder up as it would be on the bunks, and measure the angles of the side of the step, and the top of the step (long edge and short edge). I used the Iphone’s “measure” app to get the angles. Worked well enough to get the point. Using the table saw I set it up to make the first cut of 35 degrees. Set the gate where the cut will be near the center of the board, and carefully rip a cut through the Test step.
Reset the table saw to 25 degrees, measure the depth so it falls at the end of the cut. Set the gate so the cuts match at the apex, and rip the next cut.


Test fit the one to make sure the cuts line up on the ladder rungs. Adjust your measurements as needed.
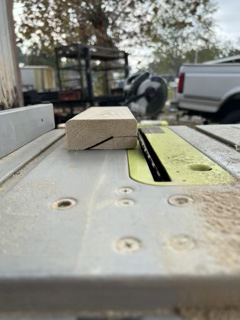
After my test fit, I made my adjustments, ripped one cut through 4 steps. Then set the table saw to the other cut, and ripped through the steps again, creating an angled channel in the steps.

Step 3: Clean the edges. All the cuts were rough and needed to be cleaned up and the sharp edges needed to be cut down. I used a 1/4″ rounded router bit to dress up the steps. I then attacked each with some 80 grit sand paper to get rid of any splinters or rough edges and print that may have been on the boards. Followed this up with a slow grind on 800 grit and got a nice smooth step to go on the bunk ladder.

Step 4: Blend to surroundings. Our Camper is a grey interior. We matched a stain as close as we could find from the big blue box home improvement store. Stained the steps as directed.
Step 5: Attach steps to bunk ladder. I drilled 3 holes on each of the ladder rungs. Fitted each step up, and attached them with 1/2″ #8 wood screws.

Step 6: Move it back in. After sufficient time for the stain to dry and quit smelling, we placed the newly user friendly ladder back into the bunk room.

This morning project made this painful ladder that came with our RV into a useful set up steps to get into and out of the upper bunk. This allows our child to use the upper bunk without the pain of the original bunk ladder. The additional weight of a couple pounds is worth the usability of the ladder. And mamma is happy, too!


